Blog

First Long Exposures with the Fujifilm X-T1

Since the Fujifilm X-T1 was announced in January, I've been on the fence about purchasing one to replace my X-Pro1. As much as I like the X-Pro1, the fall it took in September last year seems to be slowly taking its toll. After considering my options, I went ahead and ordered the X-T1 kit which includes the XF 18-55mm lens.

My X-T1 arrived Friday and this past weekend, during a break in the rain, I took it along with the XF 18-55mm to Huntington Beach to shoot a few long exposures. After one morning of shooting, here are my first impressions on using the X-T1 for long exposure photography.

The Good

The Images - no surprise here since the X-T1 uses an updated version of the X-Pro1 sensor which is also in the X100S. I haven't processed any RAW files yet since they aren't supported in Lightroom, but the JPEGs are typical Fuji.

The Viewfinder - I'll be honest, I was a little underwhelmed by the new electronic viewfinder at first. Perhaps, my expectations were too high because of all the glowing reviews I had read. Once I put it to use at Huntington Beach however, I started to see and understand what all the fuss was about. In good light, the viewfinder along with all its new technology is really something to behold. Since I often focus manually when shooting long exposures, the new dual screen display made checking focus much easier. Especially now that I can set the focus peaking color to red, what a difference!

The Tilting LCD - this is definitely a nice addition. Not something I needed, but it really does help when shooting on a tripod. I found the display a little dim when I was composing in bright sunlight, perhaps I should've adjusted the brightness setting. In any case, I ended up using the EVF when this was the case so having both options was a big plus.

The ISO Dial - on the X-Pro1 and X100S, I leave Auto ISO on unless I'm shooting long exposures. To make things faster and easier, I program one of the custom settings on both cameras to set my ISO to 200. With the X-T1, this wasn't necessary since it can now be done with the turn of a dial. The locking ISO dial works for me because I don't need to change my ISO very often or very quickly. For those that need to change ISO frequently, the lock button on the ISO dial may slow things down a bit.

The Bad

The Buttons - by far, my biggest complaint about the X-T1 are the buttons, especially those on the 4-way directional pad. They are too recessed and don't provide enough feedback to know when they've been pressed. I understand that changes were probably necessary to accommodate weather sealing, but these are the buttons many people use the most. I now find the task of changing my AF point to be a more difficult and slower process. While this isn't a deal breaker for me because my subjects tend to be stationary, it may be for those that need to change their focus point quickly.

The Threaded Shutter Button - or lack there of, most likely another trade off to accommodate weather sealing. This won't matter to some, but for anyone that wants exposure times exceeding 30 seconds, a $50 remote from Fuji is now required (at least until something cheaper comes along).

The Bottom Line

As you can see, the good for me outweighs the bad. While the X-T1 isn't perfect, it does offer several improvements for long exposure photography over the X-Pro1. The biggest ones being the new EVF and tilting LCD. Are these must have improvements, not by any means. But since I was in the market for a new camera, they are certainly welcomed.

My recommendation to anyone considering the X-T1 as an upgrade from the X-Pro1 or X-E1/2 is to try it out in the store first. While the new EVF really is great, it may not be enough to warrant an upgrade. Especially if you are using an X-E2 which already has the updated X-Trans sensor found in the X-T1.

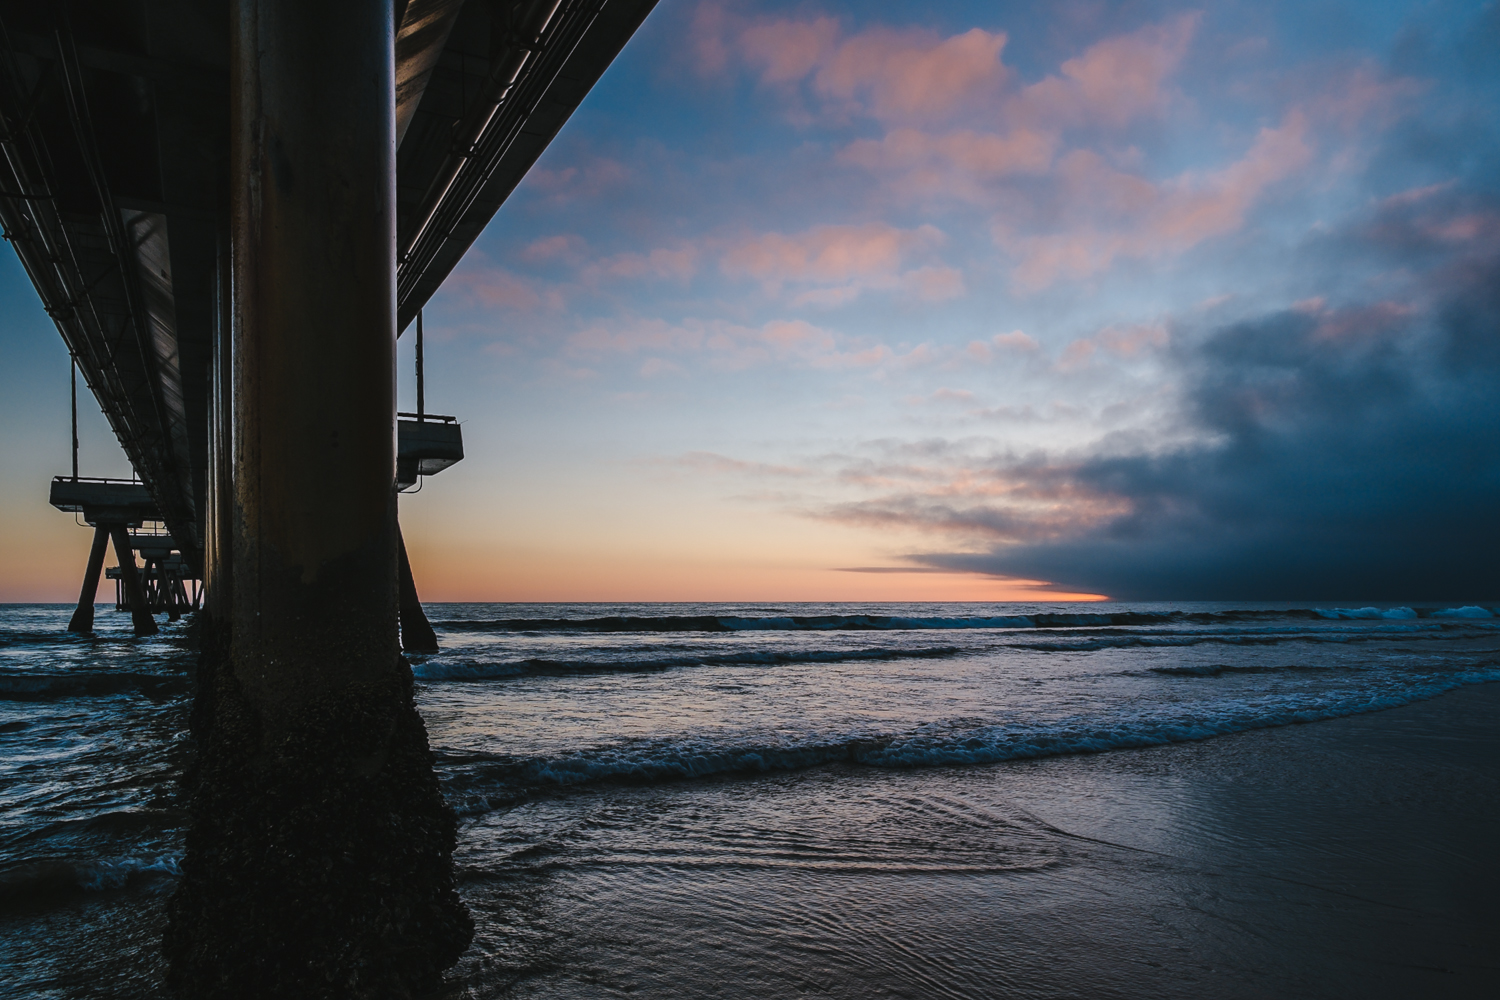
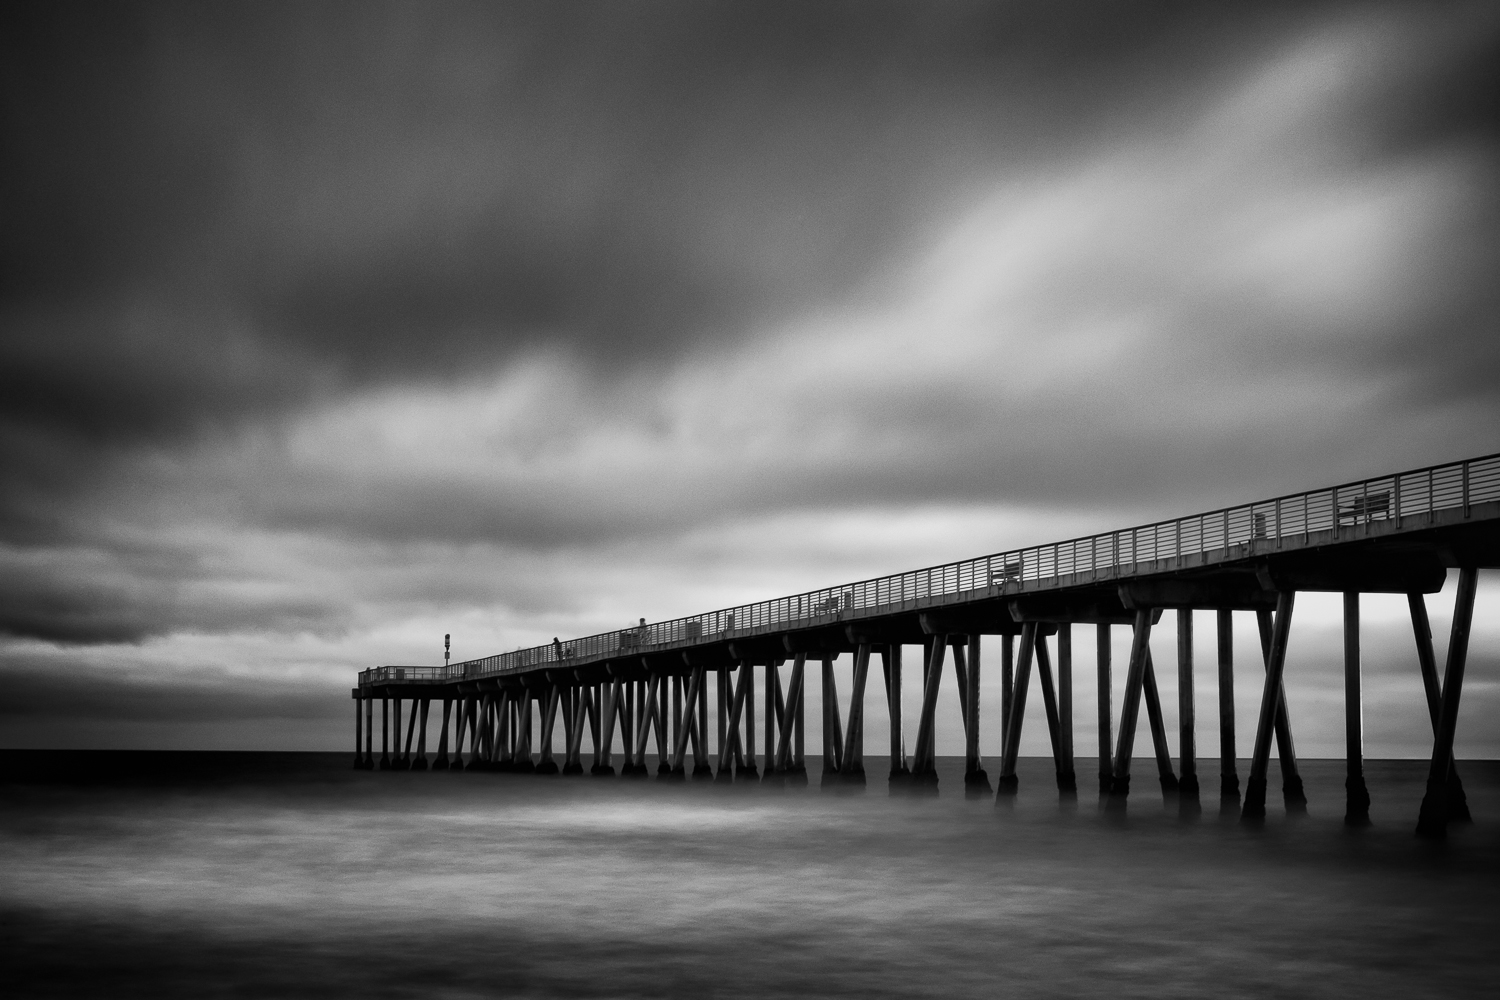
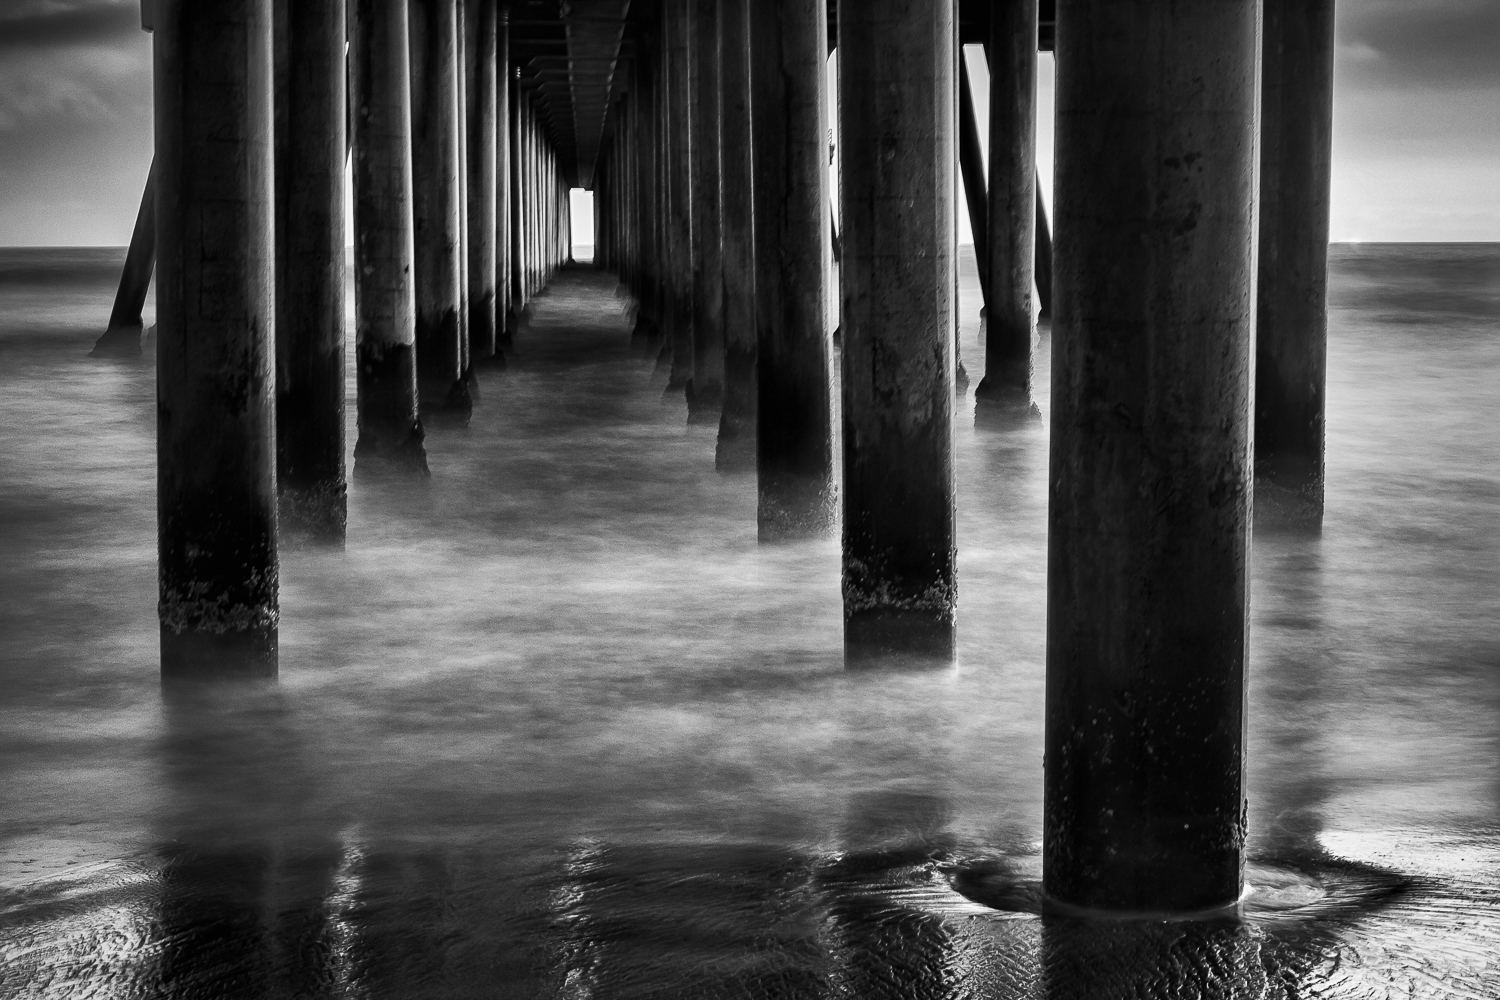
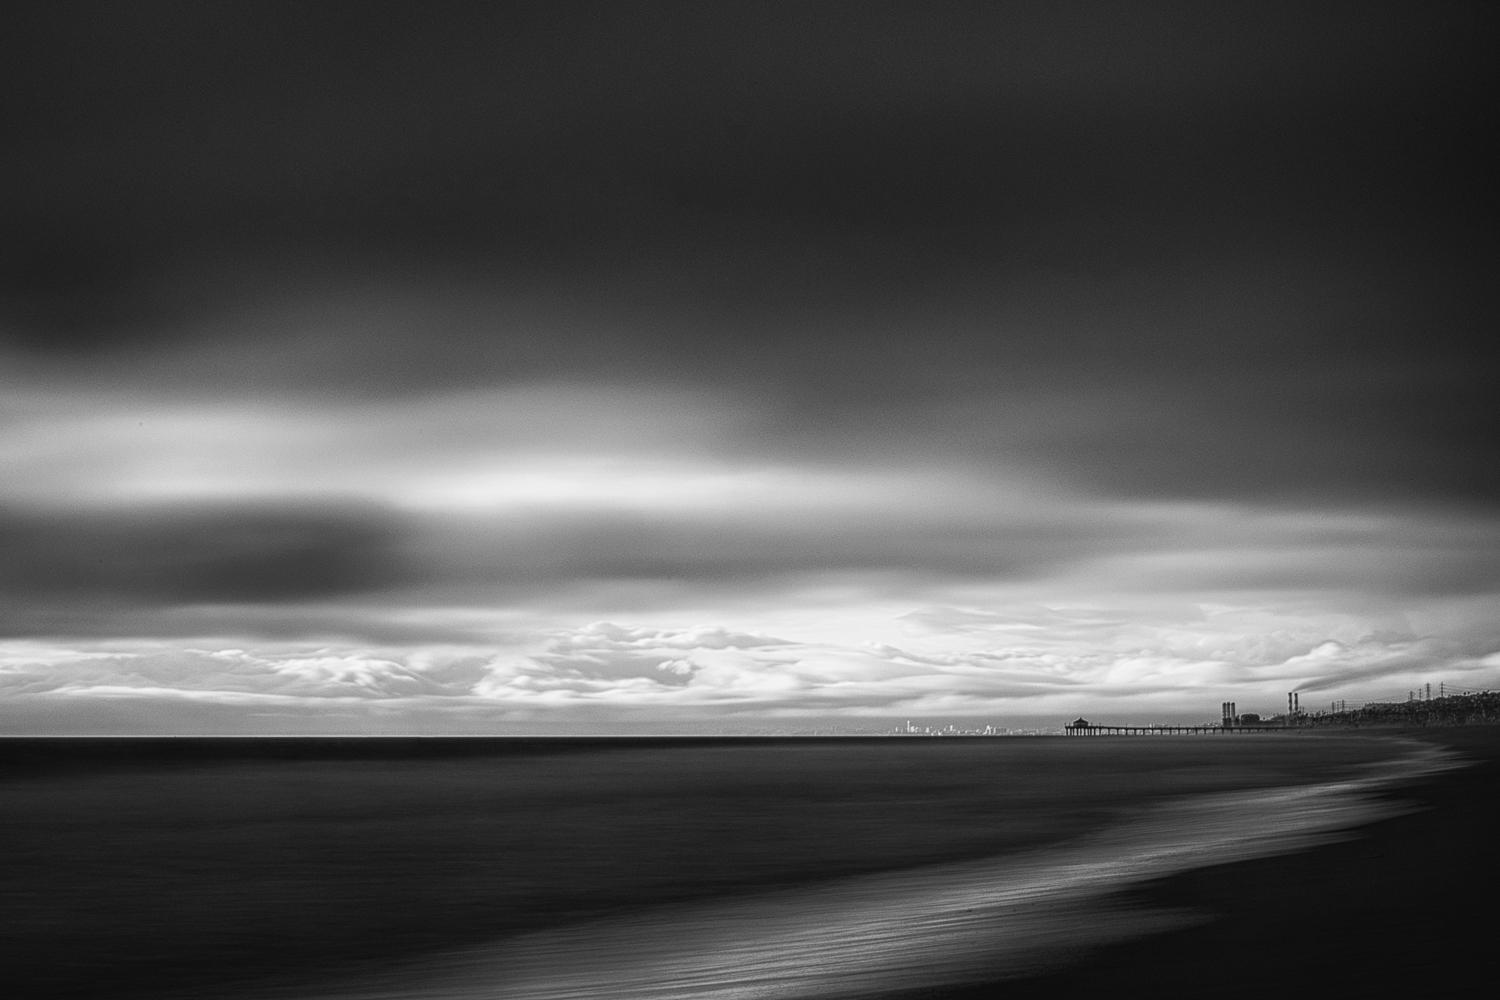
With that, I'll leave you with my first long exposure images from Huntington Beach shot with the X-T1 and XF 18-55mm.

3.2 seconds at f/11

3.2 seconds at f/11

9 seconds at f/16

9 seconds at f/16

12 seconds at f/22

12 seconds at f/22

17 seconds at f/22

17 seconds at f/22

9 seconds at f/22

9 seconds at f/22

Chasing Clouds with the X-Pro1

This weekend was a good reminder of the importance of being flexible, especially in long exposure photography. I set off Saturday afternoon to photograph Arch Rock in Corona del Mar and to test out a Fujinon XF 60mm I purchased a couple weeks ago. When I got to Corona del Mar, the skies in the area were completely overcast making the conditions less than ideal for shooting long exposures. As I looked out over the water and contemplated heading home, I noticed that the clouds over Newport Beach showed much more promise. So with an hour before sunset, I jumped back into my car and headed towards Newport Beach. As I made my way towards Newport Beach, I thought that the cloudy skies would make a good backdrop for the Balboa Pier. Upon arriving, I abandoned the idea of testing out the XF 60mm and switched to the XF 14mm so I could capture the pier along with all the details in the sky.

Here are three of my favorite long exposure images from a Newport Beach sunset that I nearly missed all together. For all three of these, I used my XF 14mm and Lee Seven5 system which consists of a Big Stopper 3.0 ND and a Soft-Edge 0.9 Grad ND.

90 seconds at f/16

90 seconds at f/16

85 seconds at f/8

85 seconds at f/8

180 seconds at f/11

180 seconds at f/11

Venice Fishing Pier

After being home sick for several weeks, I was finally feeling well enough this weekend to head out for some photography. So on Sunday afternoon, we headed down to Venice Beach to check out the Venice Fishing Pier. After a few weeks off, it felt great to get out with a camera and to enjoy yet another beautiful Southern California sunset. Here are three of my favorites from the visit, all shot with the X-Pro1 and XF 14mm and edited using the new VSCO Film 04 presets.

Thinking Inside the Box

Still struggling to find my creativity, I decided to take my own advice and turn to the work of others for some inspiration. While reading David duChemin's blog and looking through Josef Hoflehner's images, I realized how little I knew about shooting in the classic 1:1 aspect ratio. I must admit, even though I was on Instagram for a short while, I never really got swept up into the Hipstamatic/Instagram craze. Maybe it's because my love of photography didn't originate in the film days or maybe it's because I just don't care for the look of images processed in those apps. Whatever the reason, I haven't spent too much time thinking about how my images would look in a square format. 

After reading David duChemin's thoughts on the Fujifilm XE-1, I realized that my X-Pro1 lets me shoot in a 1:1 aspect ratio using either the optical or electronic viewfinders. This realization immediately got me thinking about the things I could do to change my routine the next time I'm out shooting. My first thoughts include combining the square format with the various film modes available with the X-Pro1. At this point, the possibilities seem endless, which is a good thing. I just need to keep the wheels turning until I have a chance to go out to make some photographs. In the meantime, I decided to crop a few of the images I made last month of the San Clemente Pier in the 1:1 aspect ration to try and start seeing in the square format. Here are two of the photographs that I cropped and then converted to black and white using Silver Efex Pro 2. Stay tuned for more photographs from my new project, hopefully soon.

Revisiting Silver Efex Pro

I downloaded a trial for Silver Efex Pro a few years ago and was blown away by the black and white conversions I was able to create. Up to that point, I was using Lightroom to do the conversions and was satisfied with the workflow and results. After seeing what I could do with Silver Efex Pro, I never looked at my black and white conversions done in Lightroom quite the same way. The only problem was this was back in 2010 when the plugin for Lightroom cost $199. As good as it was, I just couldn't justify spending that much on a single plugin.

With the recent announcement that Nik Software (now a part of Google) had dropped the price of their entire collection to $149, I decided to give the latest version of Silver Efex Pro a try. Using Silver Efex Pro 2 as a Lightroom plugin is still quick and painless and the results it helps to create are still stunning. The presets provide a great starting point for the conversion and the localized adjustments make it possible to really fine tune an image. I'm only 5 days into my 15 day trial, but I've pretty much already decided that this time around, Silver Efex Pro is here to stay. Here are some of the conversions I did of my recent long exposure photographs made of various piers around Southern California.